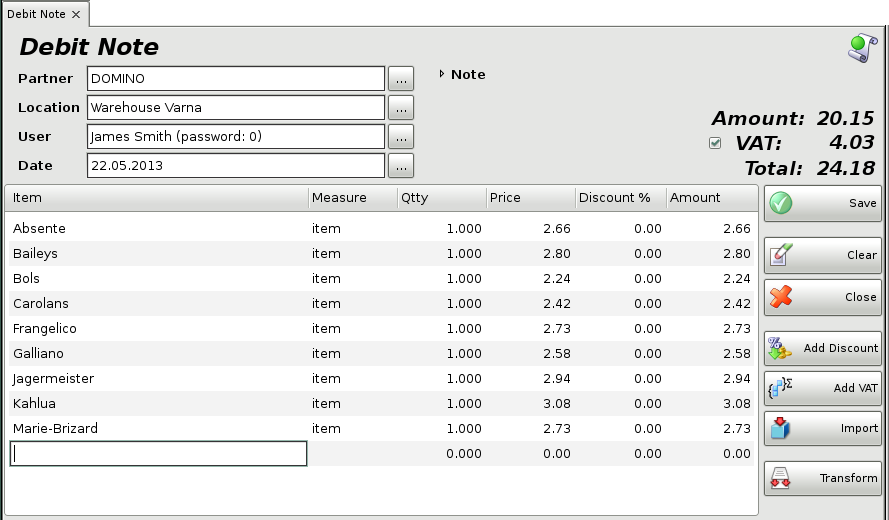
Use a Debit note operation to amend the amount of an issued document. The application will then print a debit note document. The debit note is issued only for an already-issued invoice. The Debit Note operation reduces the quantities of items in stock.
To fill in the Debit Note window do the following:
In the Partner field fill in the name of the customer/company, buying the items.
To select a partner do one of the following:
- use keyboard shortcut F4 in the partners list;
- use the Enter key in the partners’ list;
- double-click the partner in the list;
- type the name of the partner in the text field;
- type the code of the partner in the text field.
In the Location field fill in the name or code of the location, from which quantities will be taken.
To select a location do one of the following:
- use keyboard shortcut F4 in the locations list;
- use the Enter key in the locations list;
- double-click the location in the list;
- type the name of the location in the text field;
- type the code of the location in the text field.
In the User field fill in the name of the employee, who will perform the sale.
To select a user do one of the following:
- use keyboard shortcut F4 in the users list;
- use the Enter key in the users list;
- double-click the user in the list;
- type the user’s name in the text field;
- type the user’s code in the text field.
In the Item field fill in the items, which will be bought.
To select an item do one of the following:
- use keyboard shortcut F4 in the items list;
- type the name of the item in the text field;
- double-click the item in the list;
- type the code of the item in the text field;
- type the barcode of the item in the text field.
In the Date field fill in the date of the document.
Select the date in the Calendar window by pressing the F4 key or by double-clicking in the text field.
If you wish to select more than one item, open the items list by pressing the F4 key, hold down the Ctrl key and click the desired items. You can select adjacent items by holding down the Shift key and using the arrow keys.
In the Qtty column fill in the number of items being purchased. Press Enter to move on to the Price column and fill in the sale price of the item (if no price group has been selected). Press Enter to confirm. The application automatically fills in the Amount column. Use the same method to enter data about each item bought by the customer. To save the document, press the F9 key. To cancel the operation, press the Esc key.
If you are working with prices with VAT included, but wish to enter sale prices of items without VAT, to save the data correctly in the database, select the “Subtract VAT” button and the prices will be automatically recalculated. If you are working with prices without VAT and you enter prices with VAT included, the application will automatically recalculate the prices using the “Add VAT” button.
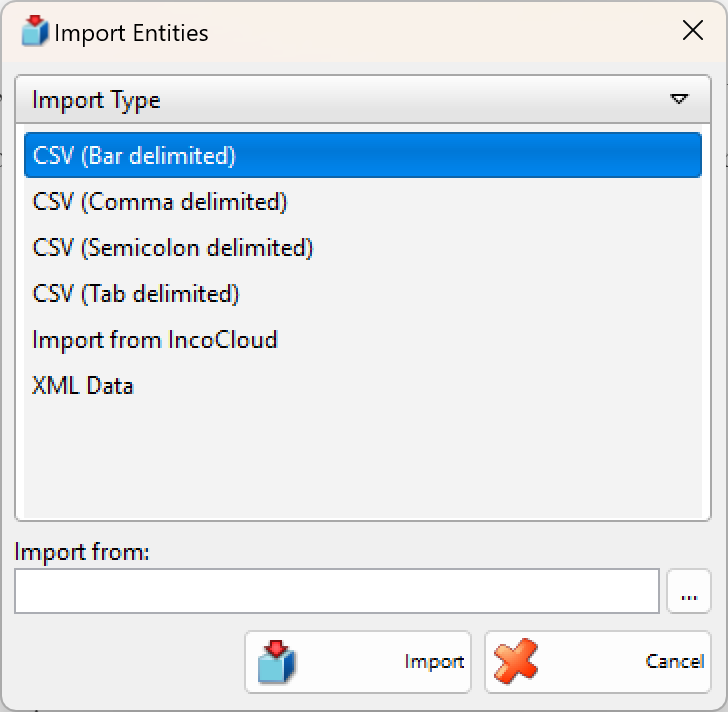
Through the button Import, you can select the file, which will be imported in the program. This file contains all the items and their parameters for the operation.
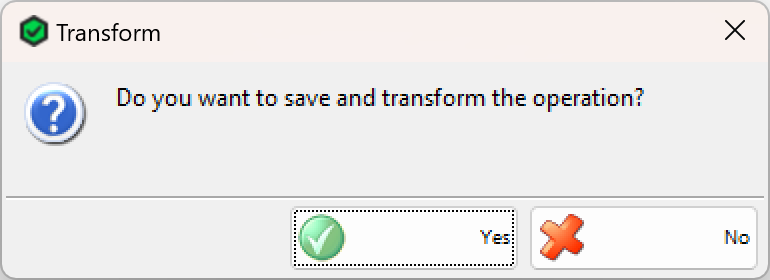
Through the button Transform the particular debit note might be transformed in another operation.
If you are working with lots, you may enter a lot number, a serial number, manufactured and expiration dates and the location of each lot in the warehouse in the sale window. Then enter a sale quantity and press Enter. The application will split the quantity by lots, depending on the method set in operations settings. In case you do not provide lot information, the Lot column is filled in automatically with “NA”.

If you are working with the Choice item management method, then after entering a sale quantity and pressing Enter, the application will open a window that contain all available lots for the selected item. Select a lot and press Enter or click the OK button. Then the lot will fill in the sale window.
When you save the operation, the application may offer you to print the sales document, depending on the Print Settings.
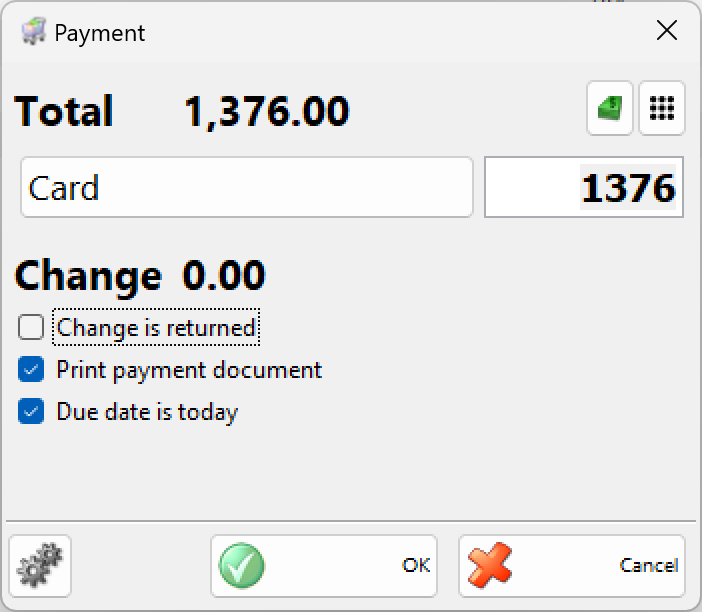
Then you may specify the payment type and whether the document (or part of it) is paid or remains due and print fiscal receipt, if there is added such device.
When you are done with the Payment window, you must fill in the Issue Debit Note window.
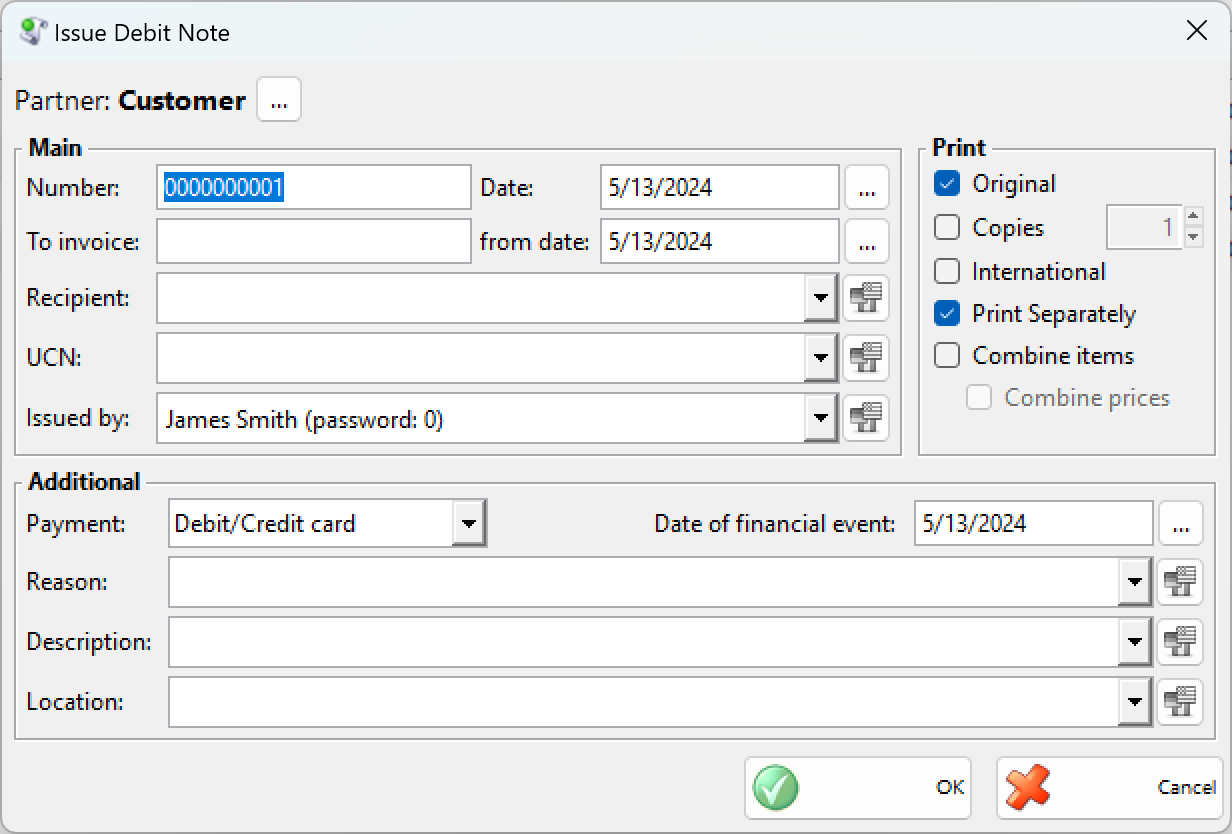
You can use it to enter general information in the issued invoice: document number, date of issuing, from date, to invoice, recipient, recipient’s UCN, and the name of the person issuing the document. You can enter additional data as well: payment type (in cash, via bank or via card), date of the fiscal event, the reason for the transaction, description and location of the deal.
You can choose the number of print copies – originals and copies.